This step-by-step guide covers the complete installation of Volvo Tech Tool (PTT) 2.8.21 with VOCOM interface on Windows 10 x64. The process includes the main installer, post-install file replacements, APCI database extraction, and License Editor setup for offline/standalone use — no license dongle required.
💻 Requirements: Windows 10 x64, Admin rights, Internet connection, 10GB+ free disk space
✅ Result: Volvo Tech Tool 2.8.21 working offline — no dongle needed
What Is Volvo Tech Tool (PTT)?
Volvo Premium Tech Tool (PTT), also known as Tech Tool, is the official OEM diagnostic software for Volvo Trucks, Volvo Buses, Mack Trucks, and Renault Trucks. It provides full dealer-level access to all vehicle ECUs for diagnostics, parameter programming, guided fault finding, and software updates.
Version 2.8.21 is a stable release with APCI+ 0.5.1.0 support, covering all Volvo truck generations from older electrical systems through VERSION4 (FH4/FM4 Euro 6).
Installation Files — 5 Folders
The installation package contains 5 numbered folders that must be run in order:
- 1. Installer Assistant — Main installer wizard with Client ID login
- 2. Replace — Overwrite critical DLL and UI files after main install
- 3. APCI 2021.09 — Self-extracts ~2.24 GB APCI database to C:ProgramData
- 4. License Editor — Create offline license database (no dongle)
- 5. Developer Tool — Optional Developer Tool Pro (25,000+ parameters)
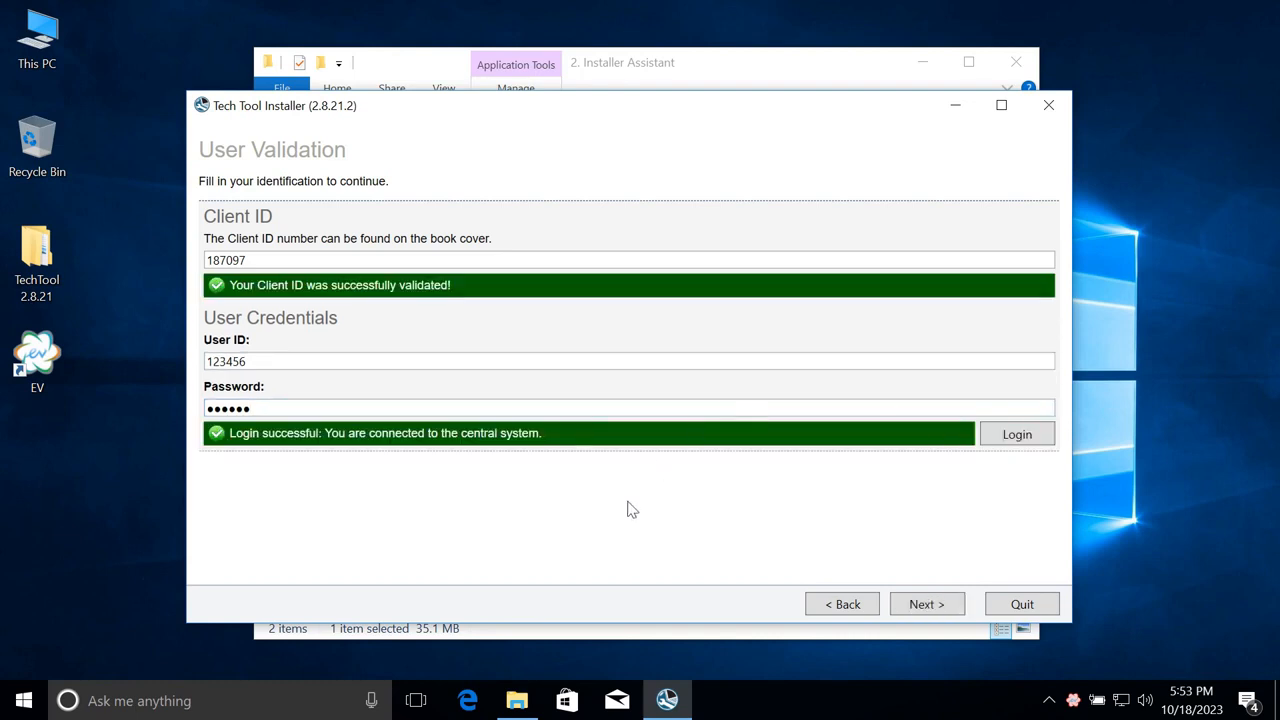
Step 1 — User Validation
Launch 1. Installer Assistant as Administrator. The first screen asks for your Client ID and login credentials. Enter your Volvo account details. If you are installing in offline/standalone mode, a valid Client ID is still required for the initial connection — the software validates online once during setup.
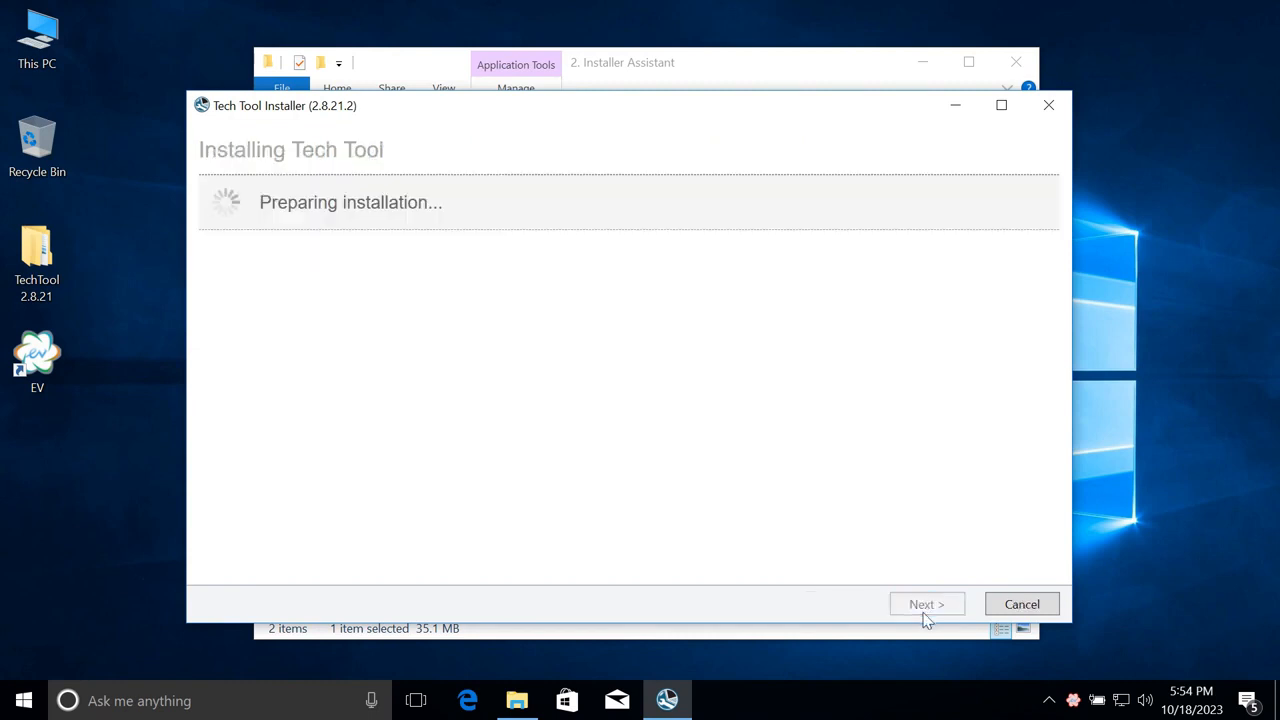
Step 2 — Preparing Installation
After validation, the installer enters Preparing Installation mode. Select Automatic for the Client Update mode — this allows the installer to manage all package downloads automatically without manual intervention.
Step 3 — Downloading 63 Packages
The installer downloads and installs 63 packages in sequence. This is the longest phase and typically takes 1-3 hours depending on connection speed. Key packages include:
- VC_redist (~14 MB) — Visual C++ runtime
- SQL Compact Edition 3.5 x64 SP2
- Tech Tool Core Normal Content (~1.5 GB)
- Tech Tool Core Developer Content
- Grade-X Content + Texts (~59 MB)
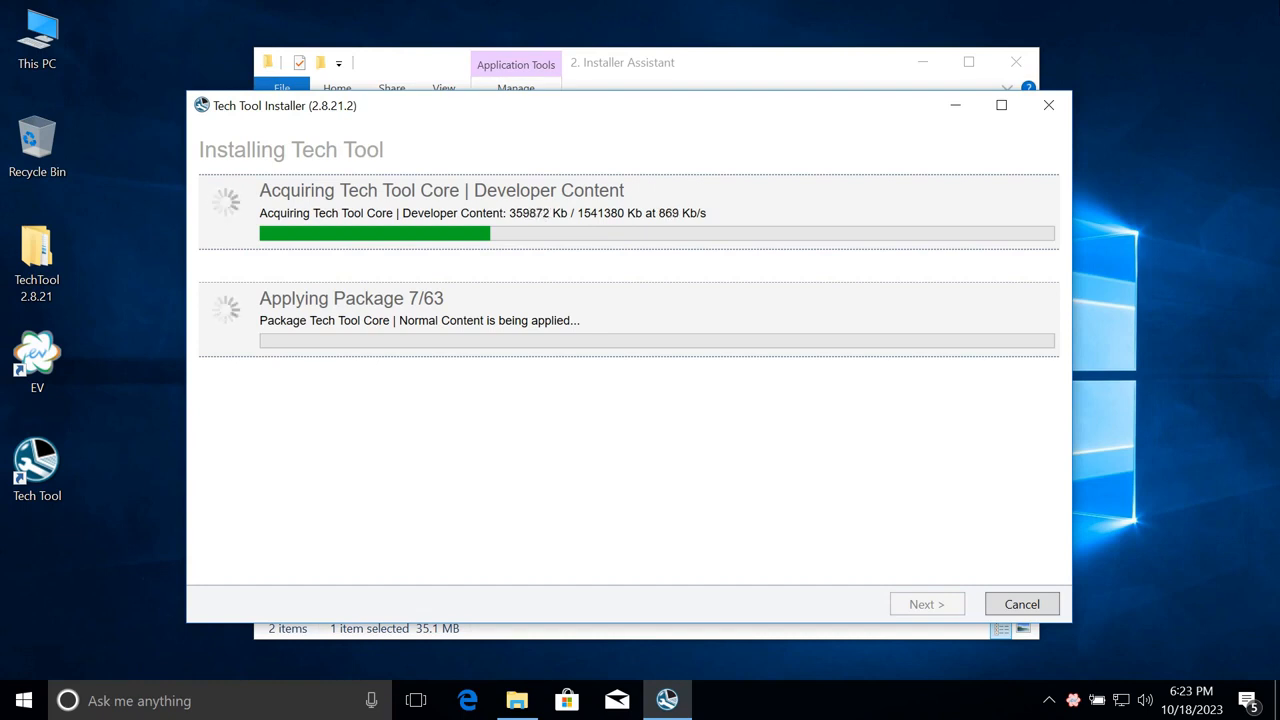
Do not interrupt this process. If the download stops, restart the installer — it will resume from where it left off.
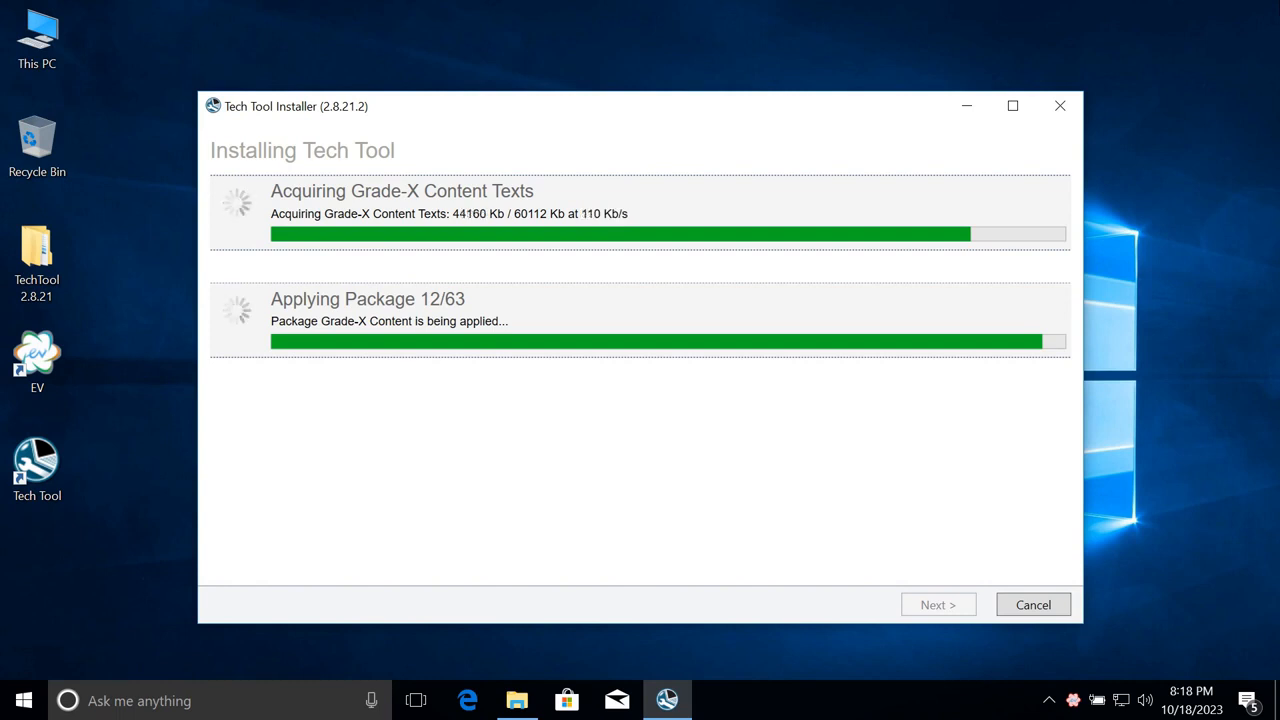
Step 4 — Grade-X Content
After the main packages, the installer downloads Grade-X Content (~60 MB). This contains additional guided diagnostic content for specific vehicle systems. The installation continues automatically.
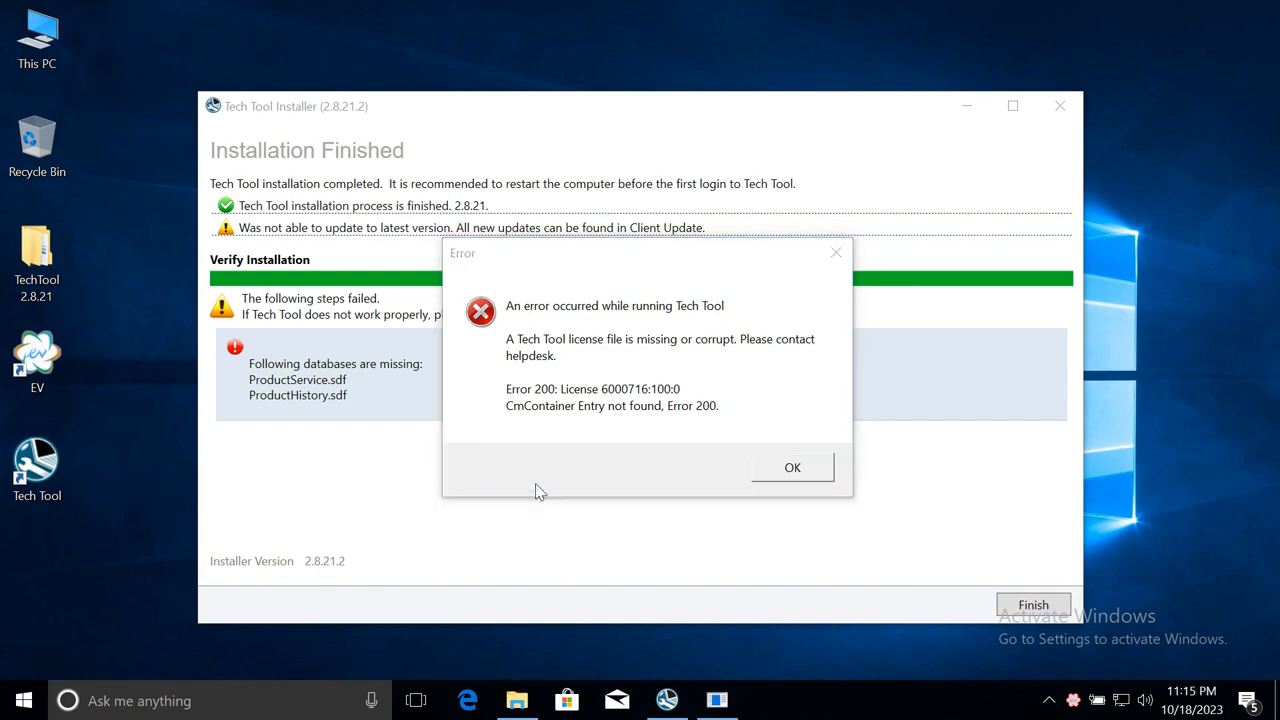
Step 5 — Installation Finished + Error 200
When the installer completes, you will see an “Installation Finished” message — but also an Error 200: CmContainer Entry not found dialog. This is expected and normal. Do not panic — this error means the license database has not been created yet. It is resolved in Step 7 (License Editor).
Step 6 — Post-Install File Replacement
Open folder 2. Replace and copy the files into:
C:Program Files (x86)Tech ToolTech Tool
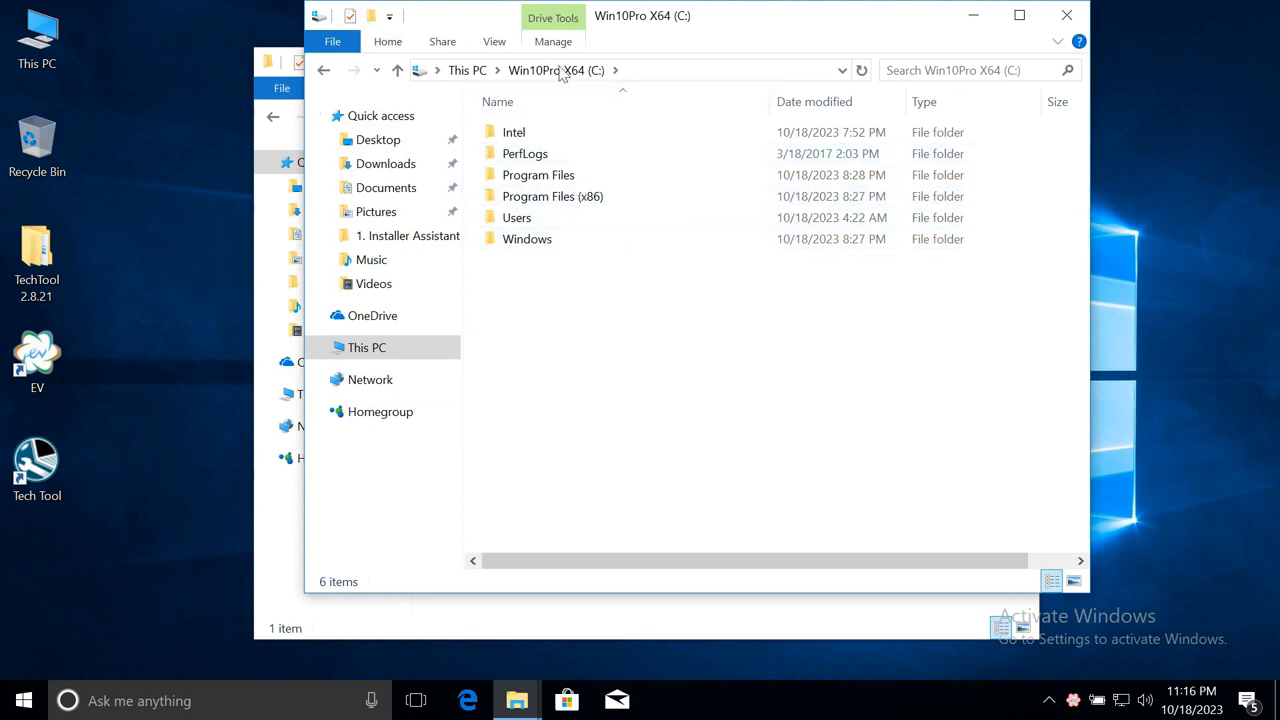
Replace when prompted. These files overwrite ProductHistoryUi and SharedDlls — critical for the software to function correctly. Then extract 3. APCI 2021.09 to:
C:ProgramDataTech ToolWaf
This extracts the full APCI database (~2.24 GB) required for parameter access and guided diagnostics.
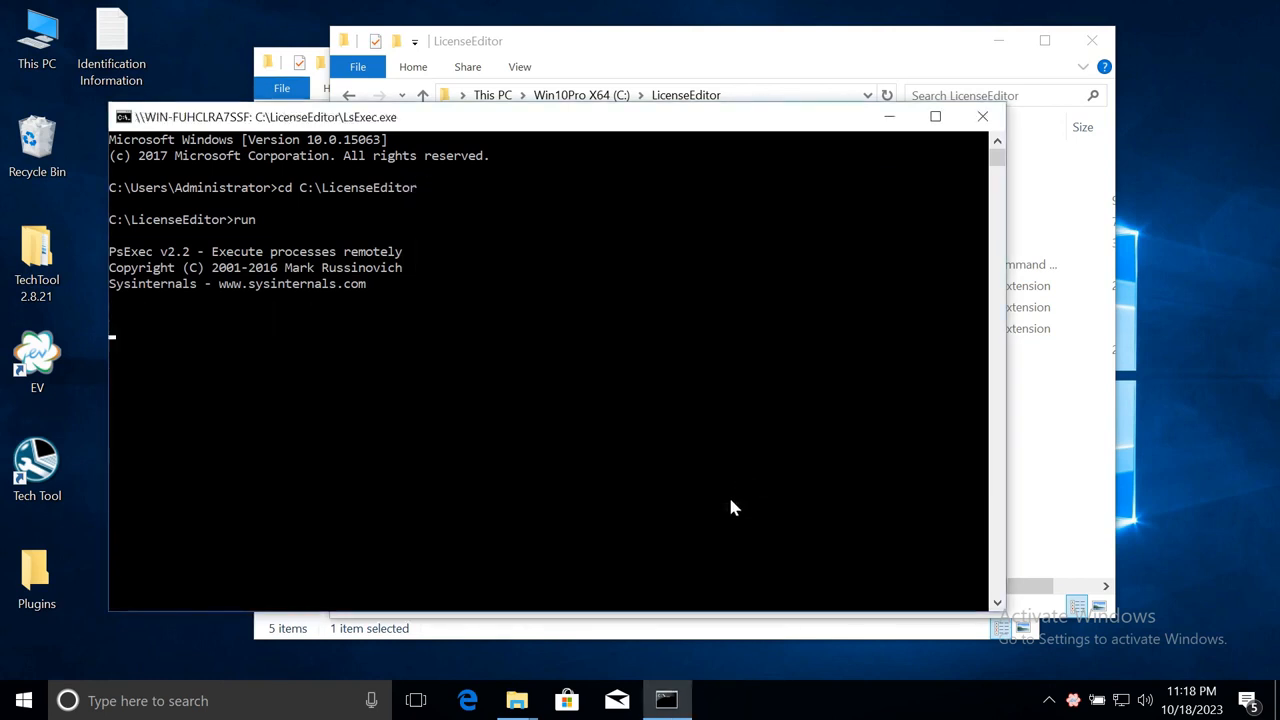
Step 7 — License Editor (Most Important Step)
This step creates the offline license that allows Tech Tool to run without a dongle or Volvo server connection.
- Open Command Prompt as Administrator
- Navigate to:
cd C:LicenseEditor - Run the License Editor executable
- Fill in the fields:
- The tool auto-fills: MAC address, Client ID, BIOS Serial, Volume ID
- Enter your name and company
- Set Business Area: VTC (for trucks) or OEM
- Set User Type: Developer (for full parameter access)
- Check “No connection to central” — this enables offline/standalone mode
- Click “Create DB with new key”
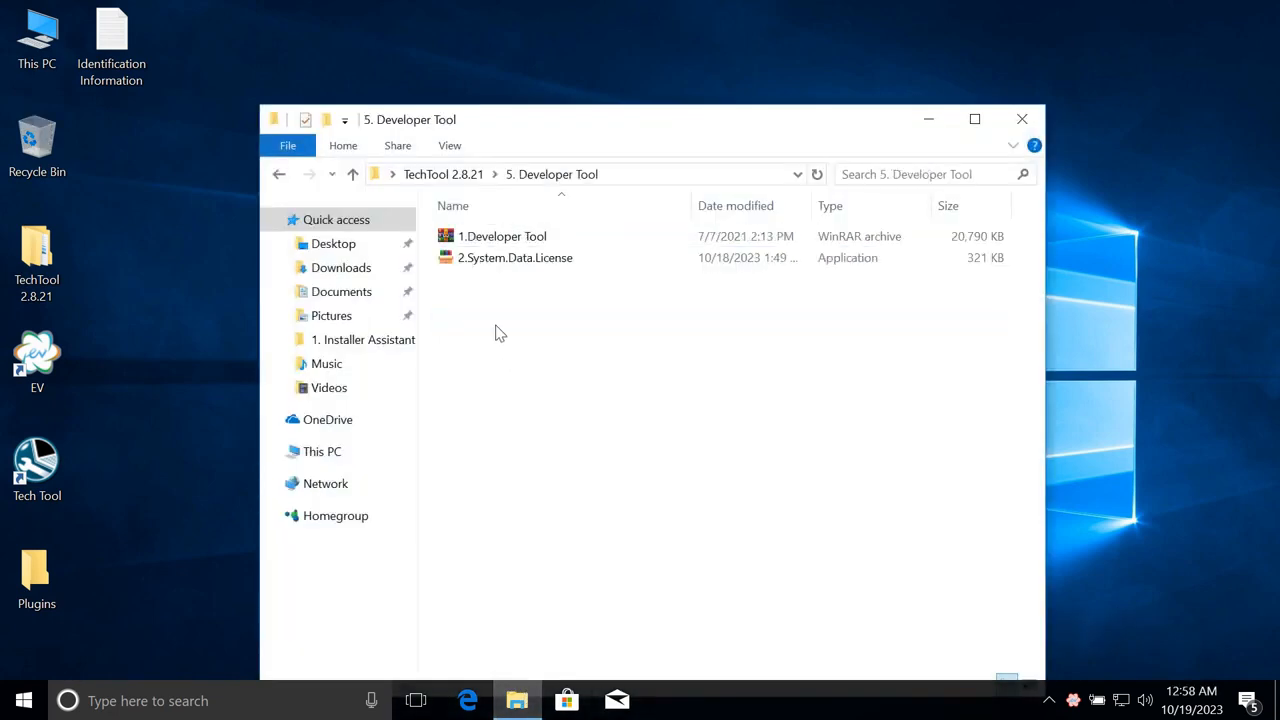
Step 8 — Developer Tool (Optional)
Run 5. Developer Tool to install Developer Tool Pro. This gives access to over 25,264 parameters for V3/V4 vehicles and 15,374 parameters for V2, across 30+ languages. It is required for advanced parameter programming such as speed limit changes, injector programming, and immobilizer work.
Step 9 — Tech Tool Working
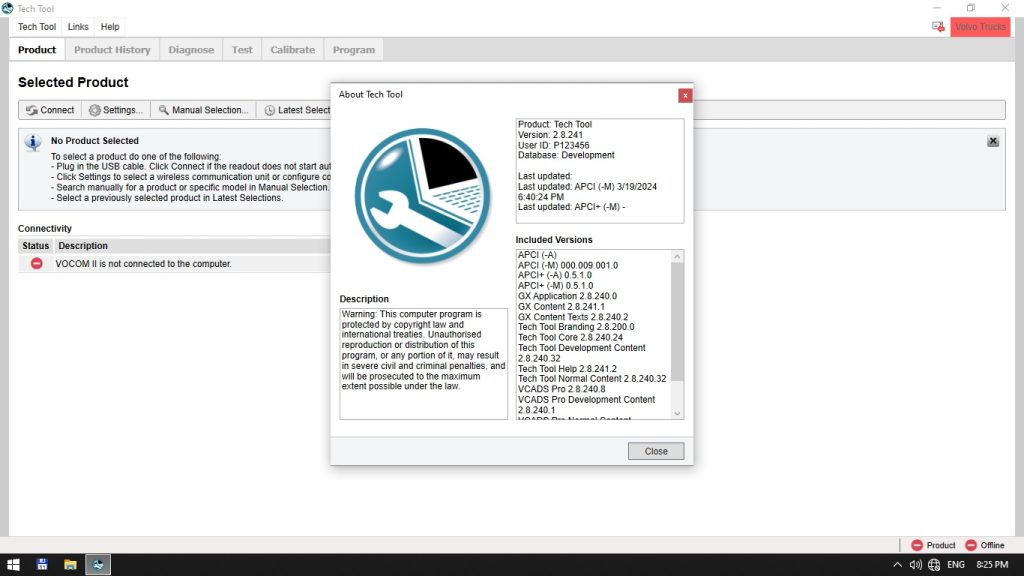
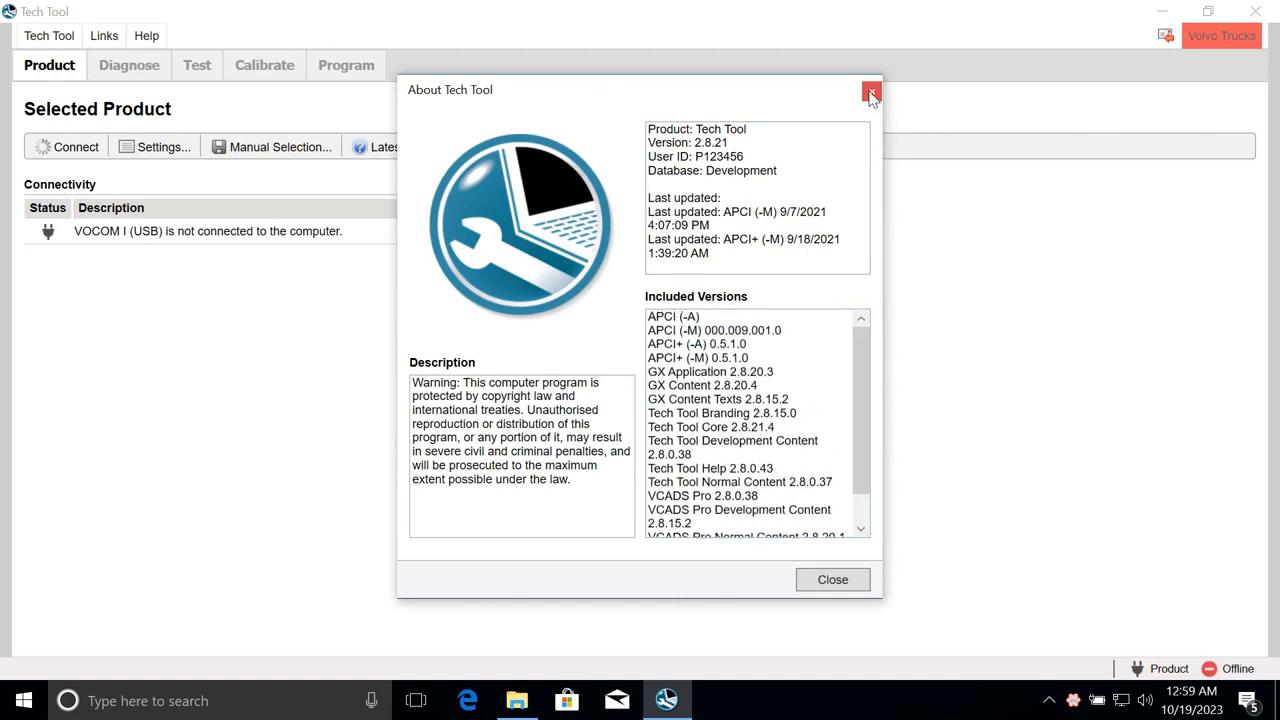
Launch Tech Tool. If the installation was successful, you will see the main Tech Tool interface with all components showing correct version numbers:
| Component | Version |
|---|---|
| Tech Tool Core | 2.8.21.4 |
| GX Application | 2.8.20.3 |
| APCI+ | 0.5.1.0 |
| VCADS Pro | 2.8.20.1 |
| Developer Content | 2.8.0.38 |
Common Issues and Fixes
Error 200 — CmContainer Entry not found
Cause: License database not created yet.
Fix: Run License Editor → Create DB with new key (Step 7 above).
Missing databases: ProductService.sdf / ProductHistory.sdf
Cause: APCI extraction not completed.
Fix: Run folder 3. APCI 2021.09 and extract to C:ProgramDataTech ToolWaf
Was not able to update to latest version
Cause: No Volvo server connection.
Fix: Normal in offline mode. Use Client Update inside the app when connected.